I was always told, a clean bike is a happy bike. It can seem like a chore to clean your bike, but it can completely change how it feels to ride and vastly improve your experience while out on those trails. There’s an art to cleaning a mountain bike, and getting it right will make it much easier and quicker.
Why Should You Clean Your Mountain Bike?
It looks better
If you’re an avid mountain biker, then you will probably know you don’t turn up to a bike park or group ride with a dirty bike. First impressions on new riders with dirty bikes are not good.
It will ride much better
The bike will work much more efficiently when not covered in mud. When it comes to cycling, every watt must be saved, and a clean bike and drivetrain works much better than a dirty one. You can hugely slow yourself down but not having a clean bike.
Dirty bikes get everything else dirty
When you finish a ride, it’s vital to wash your bike. If not everywhere you put that bike is going to make will get dirty. Then you end up cleaning more and more over time.
Components last longer
Clean components such as chains and cassettes are designed to get dirty, but they do wear out quicker because of this. You can cut the life of your components in half by not cleaning your bike. For example, riding on a beach will wear your components out twice as quickly as on the road.
We Think You’ll Like It: How to Make a Mountain Bike Faster
How to Clean a Mountain Bike
Step one: Prepare the area
The first thing you need to do is prepare the area. Ensure you have enough space and the area is safe to do so. Try not to wash your bike anywhere you might slip or damage anything. If you have a bike stand, this will be an excellent tool and make the job much easier. Then you will need some brushes and cloth to use, and we recommend using bike specific ones as they will make sure your paint doesn’t scratch or cause any damage to your pride and joy.
Step two: Rinse the bike and start the clean
Now you are ready to go, and it’s time to rinse the bike. Many people use pressure washers, and if they are low power, this is fine, but high pressure hoses can cause damage to parts and bearings, so we recommend a hose, this isn’t a car wash. Spray the bike down from top to bottom, getting as much dirt off as possible in the process. You’re going to want to do this from each side and a couple of times.
Now we have the main dirt of the bike, and it’s time to scrub it down. Fill up a nice tub of soapy water, and we recommend bike wash cleaning products. Make sure there’s no loose dirt in the water that can scratch your bike. Then pop a clean rag in, get the wet cloth nice and soapy, and start cleaning the entire bike. The order I like to go is;
- Bike Frame (Don’t forget under down tube)
- Handlebars and Seat post
- Wheels and Tires
- Drivetrain
Now we rinse all the soapy water off, see the bits we have missed and repeat the process until it is clean. You might find tires, and the drivetrain will still be a little messy, but we are going to be deep cleaning these next, so don’t stress too much.
Step three: Tires and drivetrain
Now it is time to approach the tires and the drivetrain. Typically these are the most challenging bits to clean and require special attention. They will always attract the most dirt when you are out on a ride, and certain checks must be done.
When it comes to the tires, you might need to use a bit of a tougher brush to get in between the gaps. Getting as much mud off as possible is the key, but you will struggle to remove it all. Don’t stress too much. As soon as you ride again, they will be dirty.
The drivetrain can easily attract dirt. Cleaning is vital to reduce wear for your components and get the bike working smoother. The main parts of the drivetrain are the chain, cassette. chainset and derailleurs. Firstly we need to see how bad it is, as you might get away with a surface clean. If not, you will need to fully deep clean this. If you have just a few specs of dirt and after a light clean with a cloth and a rinse looks pretty shiny, then great it’s done.
If the drivetrain has been washed with soapy water and a rinsed cloth and is still filthy, it needs a deep clean. You will need to degrease the drivetrain, some people do this with the parts on the bike, which you can, but we recommend taking some of the parts off, so you don’t damage the grease in the bearings. You will need to remove the chain and cassette. Leaving the derailleurs and chainset on is fine. Spray them with bike specific degreaser, use an old rag to wipe the grease, then rinse. Make sure you get into all the teeth on the chain rings and in the jockey wheels. Repeat this process till all the grime has been cleaned off and then replace parts.
We recommend keeping on top of surface cleaning, so you don’t need to do this often. If you are unsure how to pop into your local bike shop and ask for their advice. There are many tools that can help such as a chain cleaning device and special brushes for chain rings and hard to reach parts. Always make sure you get rid of any excess lubricant after applying as this adds to built up grime.
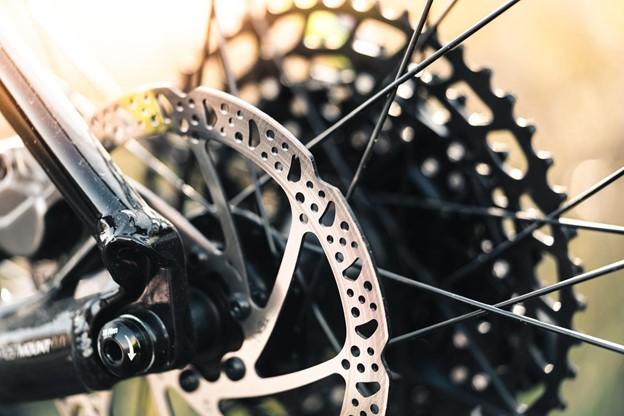
Step four: Cleaning your brakes
Typically most mountain bikes use disc brakes, and these need a bit of special attention. They are fine to wash with soapy water. You might find over time they will become less effective. It is pretty common for brake pads to get contaminated, and this means they won’t work as well and grip the disc properly.
If you find the disc brakes very laggy, replace the brake pads and use some disc brake cleaner on the rotors, and they will be okay again. After you clean your bike, the brakes will be a little squeaky, and this is normal. It’s good to avoid any kind of oil or lubrication products near the brakes as this can be an expensive error as brake pads are not cheap.
Step five: Dry the bike and do your checks
So your bike is now lovely and clean. Before you let it dry, make sure to wash all the soapy water off, as leaving this on can affect the paint over time. Leave the bike to dry in the sun, or you can use a clean, dry cloth to dry it.
Now we need to start doing our checks. The best time to check the bike is after a good clean, so you can spot any issues that could cause the bike to malfunction or break. My personal order to do this is.
Tires
Check for any significant cuts in the tires, make sure it has enough pressure in, and it is seated on the rim properly and is evenly round when you spin the wheel.
Suspension
Please make sure the suspension seals look good, it works properly, and there’s no pitting on the forks.
Bike Frame
Always look for cracks in the frame, especially on carbon fiber bikes.
Wheels
Make sure your wheels are straight and true, and when you move them side to side, the bearings are smooth and tight.
Brakes
Check the pads are not contaminated, the discs are straight and true, and they both still have life left in them. Also, make sure the cables are not snagged anywhere.
Overall
Make sure everything is nice and tightened, and there are no nasty knocks or funny noises.
Step six: Protection and Lubrication
Now your bike sits in the stand, beautiful and clean. We need to do everything we can to keep it that way. One of my biggest recommendations is to use bicycle protection spray, also known as bike polish. After your bike is clean and dry, you will spray this on and wipe your bike down, and this will leave a resistant nonsticky surface on your bike. This will stop a lot of mud sticking, and also when you come to clean it down, the mud will come off much easier.
Although we have cleaned the dirt off the bike, we will have also taken oil and lubrication off the bike. It is now time to oil your bike chain. I personally recommend dry lube if you are riding in dry conditions and wet lube for wet conditions. Apply the lube and make sure any excess lube has been gotten ridden of. Now it’s time to sit back and admire how amazing your bike is and maybe a few pictures for Instagram once you have it off the bike stand.
Step seven: Clean up
The bike may be clean, but the working area probably isn’t. You might need to wash the floor, remove excess water, clean any rags and brushes you have used, and put them away in a safe place, ready for the next wash.
We Think You’ll Like It: How to Clean Mountain Bike Disc Brakes
How to Keep on Top of Cleaning Your Mountain Bike
What you would have just done here is a relatively deep clean, and you won’t need to do this after every ride. If you did do this after every ride, it would be such a chore, and honestly, you would end up getting very bored.
I recommend cleaning your bike every few rides providing after each ride, you spray the bike down, get all the mud off it, and store it somewhere away from outdoor weather. This will hold the majority of the dirt off, and then cleaning it won’t feel like such hard work.
Cleaning Electric Bikes
If you are cleaning an electric bike, you need to make sure that you are not using a pressure washer and that you don’t soak the electrical parts too much. They are designed to be waterproof, yes, but they are not intended to have water forced into them. Take extra care around electrical components and ensure the seals are all intact when you have finished.
Frequently Asked Questions
Can I use a pressure washer to clean my bike?
You can yes, but only if it is a low power jet wash. Using a high pressure washer can damage bearings, snag cables and even damage carbon frames.
What are the best bike cleaning products?
Much-Off make fantastic cleaning products, and you tend not to need much for a really good bike clean. I highly recommend them.
Do I need a stand to clean a mountain bike?
Not really, but it does massively help. I highly recommend getting a stand. Not only because you can clean your bike, but for repairs too, it just makes it so much easier.
Is my bike ok in wet or muddy conditions?
Yes, it will be fine and it is designed to get muddy. You just have to make sure it’s not muddy all the time.
Conclusion
Having a clean bike makes such a difference. It will feel better when you ride it, it will need less maintenance, and it’s going to look amazing. Now you know how to clean a mountain bike you have no excuse to do it after a muddy ride.