
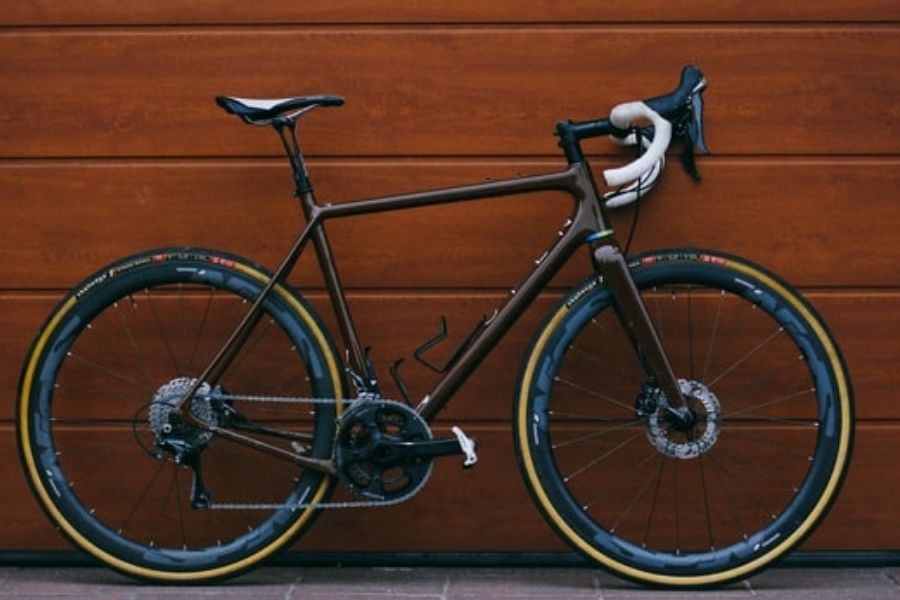
Gravel bikes are the new big thing in cycling. They are bikes that you can take anywhere and help you embrace the outdoors even more. A new sense of freedom and so many new routes to explore. A question I get pretty often is, “Gravel bikes look a lot like Road bikes. Is it possible to turn a Road bike into a Gravel Bike?” The short answer is yes, providing your Road Bike can do this. In this article, I am going to explain how.
What makes a Gravel Bike different from a Road bike?

Before we start, it’s essential to understand what a Gravel Bike is and what makes it unique compared to a Road Bike. If we can understand the differences, it makes it easy for us to make the changes on our Road bikes so that it can be a Gravel Bike.
Tires
The first thing we need to take into account is the tires. On gravel bikes, tires are much bigger than on road bikes. Having bigger tires means you can get more grip on loose trails, and it helps you get over rocks and other obstacles. Bigger tires also will help you stay more comfortable and provide the wheels with extra protection.
Flared Bars
Gravel bikes often come with Flared bars. These are drop handlebars, but they are made to be wider at the bottom, where they flare outwards. They help with control when riding in technical sections and also look fantastic.
Geometry
Geometry is the bike’s design, and Road bikes are slightly different in shape from Gravel bikes. Although we can’t cut the frame and re-weld it, there are some changes we can make to make a Road bike similar to a Gravel bike in the way it rides.
We Think You’ll Like It: Mountain Bike vs Gravel Bike
Road bike to Gravel Bike Considerations

Before we start converting our Road bike to a Gravel bike, there are things to think about. Firstly using the right bike to start with will go a long way. It would be best to aim for a Road bike with good tire clearance. If you’re not sure of your tire clearance, google the model of your bike and find out. The bigger the clearance, the better, as this will give you many more options when it comes to tires.
Also, the stem, make sure it is a Standard Stem. If you have a specialist race bike such as a Trek Madone, you will have a unique stem and bars. These cannot be swapped out easily, and you might find yourself halfway through the conversion and not being able to continue. This goes with the handlebars to make sure you use a drop bar bike and not a flat bar Road Bike.
Gravel bikes typically have disc brakes on. If you are converting from a Road bike, I would recommend using a Disc Road bike. If your bike has rim brakes, it will still work and convert fine, but the braking won’t be as effective.
Let’s Start Converting

Before we start, make sure you are in a safe environment to convert your bike, and you use proper personal protection and the correct tools. If you are unsure of any of the steps, contact someone who can help. Ensure everything is done up nice and tight and use correct torque settings.
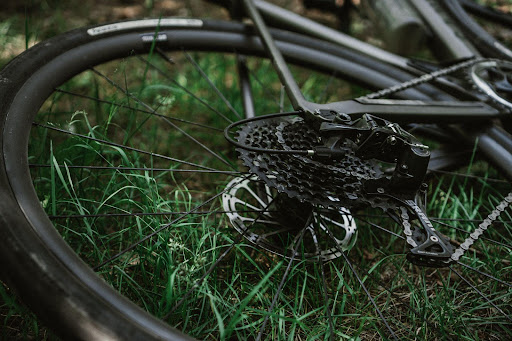
The Wheels and Tires
The first thing we need to consider is the Wheels and Tires. You might have the option to change your wheels here if you have a disc brake bike and the bike has the capability. Some people switch from Road bike wheels to Gravel bike wheels. Gravel bike wheels come in two sizes, 700c, and 650b.
If you are converting from a Road bike, you will more than likely have 700c wheels already. Some bikes have the ability to drop to a 650b wheel here, which will allow the bike to fit a larger tire. Check online to see if your bike does before buying new wheels. If you can id recommend it. If you can’t carry on using the 700c wheelset.
Step 1
Removing the Front Wheel
The first thing to do is remove the wheel in the bike’s front. You will do this by removing the Thru Axle or the quick release skewer. One out check the wheel to make sure it is in good condition, and when you’re ready, start to deflate the tire.
Once deflated, you will need to remove it from the rim. If you are using inner tubes, this will be as simple as fixing a puncture. If you are running tubeless, make sure you remove all the sealant safety off the rim.
Step 2
Putting the new tires on
So now you have a clean wheel, and you are ready to put some Gravel tires on. Firstly make sure you check the tire clearance for your bike frame. A common mistake a see a lot of people make is they just put what can fit in. Unfortunately, even if it fits, it needs room to move while riding, so it’s better to use the manufacturer’s recommended size don’t go above it.
Now it’s time to pick your tires. If I had an excellent clearance, I would aim for a set of 35c to 38c Gravel tires and aim for some that are pretty smooth, with grip on the side. If you are using tubeless, make sure to get tubeless tires. If you can’t go as big as a 35c tire, I would look at a 30c tire, or if you can fit it, a 33c tire which is generally used in cyclocross racing.
The next step is to get your tires on the rim and either pop them on ready for tubeless sealant or get a tube in and blow them up to an appropriate pressure (PSI). Do not go to the Max on the tire. Use an online tire pressure calculator to get a suitable pressure recommendation for your weight and tire size. Then when it’s all ready, pop the wheel in, making sure if it’s a disc wheel, it is the right way round. If you are tubeless, don’t forget to add your sealant.
Step 3
The Rear wheel and Final Check
Take the same process as above and repeat for the rear wheel. Make sure to be very careful around your rear gear derailleur, so you don’t bend it and end up having to go to the bike shop and have it corrected. When the wheels are back in, make sure that they move freely back and forth, and the tires not only don’t rub but they have some clearance from the frame. Check the wheels are nice and tight, and there’s no play wheel moving them side to side.
Step 4
Removing the Bars
Now we need to change the handlebars to flared bars. This isn’t essential to do when converting a Road bike to a Gravel bike, but it helps on off road technical sections. Firstly you will need to remove the bar tape carefully and keep it in a safe place. Then we need to loosen the shifters off at the Allen key point under the hoods. Once this is done, slide them off, and the bars will now have nothing attached. Remove the four stem booths, and the handlebars will come off altogether.
Step 5
Stem Change
Here you have another option to make it feel more like a Gravel bike. Many cyclists put on a shorter stem here and position it to push the bars into a higher position. Learn how to measure a stem here for your best riding experience.
This is standard practice for bike fitters and called flipping the stem. This will bring the bars slightly higher and closer to you. This will make the bike feel much more agile in the steering, and with the bars closer to the user, it gives them much more control over the bike. When changing the stem to tighten the headset bolt at the top of your fork tube, then tighten the stem after. If you are unsure how to do this, check a Youtube video.
Step 6
Adding the new Bars

Attach the flared bars where you removed them at the four stem bolts in the same position as the Road bars. Slide the shifters on and make sure they are where you need them. Don’t be afraid to jump on the bike and get a feel for them being in the right place. Just make sure the bike is still and secured to something safe. Once in the correct position, tighten them to the proper torque and then tape the bars back up again.
Step 7
Checks
The most important thing to do is check that the bike is safe to ride and everything has been tightened up. Once you have done all of this, take it for a very short ride to ensure there’s nothing loose and no odd noises.
Well Done
Now it’s time for you to ride some Gravel. Make sure you pick an excellent route to start with and don’t do anything too far outside your comfort zone. Have lots of fun and enjoy riding with your friends.